That musty smell in your home or those stubbornly high summer AC bills might not be your air conditioner’s fault. The problem could be hiding right above your head: in your old, failing attic insulation. For homeowners in Jupiter, FL, the unique climate presents a tough challenge. The problem is that in a climate like Jupiter’s, high humidity, heavy rains, and persistent pests can quickly turn attic insulation from an asset into a serious liability. Old insulation can trap moisture, which leads to mold. It can also become a contaminated nest for rodents and insects. These problems are very common in our beautiful part of Florida.
Many people think of insulation as something that just keeps a home warm. In Florida, it is more important for keeping the home cool. When it fails, the results are immediate and costly. Your air conditioner has to run longer. Your home feels damp. You might even notice strange smells you cannot find. This is where the idea of insulation removal becomes so important. Emphasize that removing this old material isn’t just about “cleaning.” It’s a critical first step toward restoring your home’s energy efficiency. It is also key to improving indoor air quality and protecting your property value. Getting rid of the old, bad insulation makes a clean start possible.
Think of it like a problem with a house’s foundation. You would not just paint over a crack. You would fix the problem first. The same is true for your attic. Simply putting new insulation on top of old, wet, or dirty insulation is a big mistake. It traps the problem. The old mold, bacteria, and pest leaves are still there. This is why a professional attic insulation removal service is needed. This complete guide will walk you through the signs you need insulation removal. We will look at the benefits of starting fresh. We will also talk about what factors influence the final project scope and the professional process from start to finish.
Table of Contents
Quick Facts Box
- What is Attic Insulation Removal? It is the professional and safe removal of old, damaged, or contaminated insulation from an attic space. This can be materials like old fiberglass, cellulose, or rock wool.
- Top 3 Reasons in Jupiter, FL? The top reasons are: 1. Pest infestation (like rodents, birds, or roaches), 2. Mold growth (fed by high humidity or roof leaks), and 3. Water damage (from storms or leaking pipes).
- Main Benefit? It creates a clean, sanitary “blank slate.” This empty space allows experts to properly air seal the attic floor. After that, new, high-performance insulation can be installed correctly.
- Is it a DIY Job? It is not recommended. This job requires special safety equipment, known as PPE. It also needs high-powered vacuums and containment procedures. These steps stop the home from being contaminated with airborne fiberglass, mold spores, or bacteria.

When is Attic Insulation Removal Necessary for Your Home?
Insulation doesn’t last forever. In a place like Jupiter, its lifespan can be cut short. Certain events can make your attic’s insulation not just ineffective, but dangerous to your health. Knowing the signs that you need an attic insulation removal is key to protecting your home. A simple visual check might not be enough. Smells and health symptoms are also big clues.
Here are the most common reasons a full removal is needed:
After a Pest Infestation
This is a primary reason for insulation removal. Pests are not just annoying. They are destructive. Rodents (like rats and mice), birds, raccoons, and even insects will make nests in soft insulation. When they move in, they leave behind feces, urine, and nesting materials. This waste is hazardous. It can contain bacteria and viruses. These germs can get into your home’s air. Also, the pheromones left behind are a signal. They tell other pests that your attic is a good place to live. Just removing the pests does not remove the dangerous waste they left. The only way to truly clean the space and break the pest cycle is with a full attic insulation removal and replacement.
Mold or Mildew Growth
If you smell a musty, earthy odor in your home, your attic is the first place to check. This smell is a major red flag for mold. Moldy insulation is a serious health risk. This is very common in Jupiter attics. The high humidity in the air is one cause. Roof leaks are another. Even AC ducts in the attic that “sweat” or condensate can drip onto insulation. Once insulation is wet, it becomes a perfect food source for mold. Mold spores are very small. They can easily travel from the attic into your HVAC system. Then, they are blown all through your living space. This can trigger allergies and asthma. The only fix is to remove the moldy material completely.
Significant Water Damage
Following a roof leak, a hurricane, or a plumbing failure, insulation can get soaked. Wet insulation is useless insulation. When insulation (especially fiberglass or cellulose) gets wet, it compresses. It matts down and loses all its “fluff.” That fluff is what traps air and gives the insulation its R-value, or its power to insulate. Wet, compressed insulation will not dry out properly in a humid attic. It will stay damp for a very long time. This leads to mold growth and can even cause the wood in your attic to rot. Any insulation that has been saturated by water must be removed.
Fire or Smoke Damage
If a home has had a fire, even a small one, the smoke can cause big problems. Insulation, especially the blown-in kind, is like a giant sponge. It will absorb and hold onto the smell of smoke. This smell is impossible to remove with sprays or chemicals. It gets deep into the fibers. Every time the air moves in the attic, that smoke smell can be pulled into the home. Soot and ash are also very hard to clean out of insulation. The material is considered contaminated and must be removed and replaced.
Extreme Age & Ineffectiveness
Sometimes, the problem is just age. If your home is older, your insulation might be, too. Insulation that is decades old may be very thin. It can be settled, dusty, and full of allergens. Older insulation also has a much lower R-value than modern materials. This means it is not doing a good job of stopping heat. In Jupiter, this means the summer sun beating on your roof will heat up your attic like an oven. That heat then pushes into your home. This is why a company like All Thermo Insulation, with over 20 years of experience, often recommends starting fresh. Removing the old, ineffective material lets you properly air seal and install new insulation at the right level.
What Are the Benefits of Removing Old Insulation?
Getting rid of old, bad insulation is a big project. But the good things that come from it are even bigger. Homeowners in Jupiter often feel the difference right away. This is not just a cleaning service. It is a worthwhile investment in your home’s health, comfort, and value. The change can be surprising. Many families find they feel better and their homes are just more pleasant to be in.
Here are the main benefits of a professional insulation removal:
Improves Indoor Air Quality
This is maybe the most important benefit. The air in your attic does not always stay in your attic. Through small cracks and gaps, air can move between your attic and your living area. If your attic has mold spores, pest waste, bacteria, and dust, that is what you are breathing. A professional insulation removal physically removes these dangerous things. It takes the source of the problem out of your house. This directly leads to cleaner, healthier air for your family. People with allergies or breathing problems often notice the biggest difference.
Eliminates Trapped Odors
That musty smell from mold or the sharp, ammonia-like smell from rodent urine can make a home feel dirty. These smells get trapped deep in the insulation fibers. It is impossible to clean them out. The only way to get rid of the smell for good is to get rid of the insulation. An insulation removal vacuum sucks all the old material, and the bad smells, right out of the home. This leaves the attic smelling fresh and clean.
Allows for Proper Air Sealing
This is a huge benefit that many homeowners do not know about. Your attic floor is full of small holes. There are gaps around light fixtures, ceiling fans, plumbing pipes, and electrical wires. Hot attic air leaks into your home through these gaps. And your expensive cool air leaks out. You cannot seal these gaps if they are buried under old insulation. An attic insulation removal clears the floor. This “clean slate” lets technicians find and seal all those small cracks. This step alone can make a big difference in your energy bills.
Creates a “Clean Slate” for New Insulation
When you buy new, high-performance insulation, you want it to work at 100%. To do that, it must be installed on a clean, flat surface. A professional insulation removal company like All Thermo Insulation prepares the attic perfectly. Removing the old material ensures your new insulation investment gives you the best possible performance. It will have the right R-value and will cover your whole attic evenly.
Reveals Hidden Issues
You cannot see what is under all that old fluff. When an attic is cleared, it allows for a full inspection of the attic floor. This is a chance to find hidden problems. Technicians can spot hidden water damage or stains on the drywall. They can find wood rot on the joists. They can even find dangerous chewed electrical wires from rodents, which are a serious fire hazard. Finding these problems early saves you from much bigger, more expensive repairs later.
Stops the Pest Cycle
If you had pests, they left behind smells and trails. These smells, or pheromones, act like a “vacancy” sign for new pests. A simple cleaning will not get rid of them. But a full attic insulation removal and replacement does. When the contaminated material is gone, the attractant is gone. When this is combined with professional sanitizing, it stops the pest cycle. It helps make sure that once the pests are gone, they stay gone.

A Step-by-Step Guide to the Professional Insulation Removal Process
A professional insulation removal is a very systematic job. The process is focused on safety and containment. The main goal is to protect the rest of your home and your family from the dust and contaminants in the attic. A company like All Thermo Insulation follows strict steps to get the job done right. This is not a simple shop-vac job. It is a careful, planned procedure.
Here is the step-by-step process you can expect from professionals:
Home & Site Preparation
First, the crew protects your home. They lay down strong plastic sheeting. This creates a containment path. This path usually goes from the front door to the attic access point (which might be in a hallway or closet). This plastic protects your floors and walls from any dirt or debris. The crew will also seal off any air vents in the work area to make sure no dust gets into your HVAC system.
Set Up Extraction Equipment
A high-powered, commercial-grade insulation removal vacuum is set up outside the home. This is not a vacuum you can rent. It is a very large machine, often mounted on a truck or trailer. A large-diameter, heavy-duty hose is run from this vacuum outside, up the containment path, and into the attic. The machine stays outside to make sure all the dust, fibers, and contaminants are kept out of your home.
Safe & Contained Removal
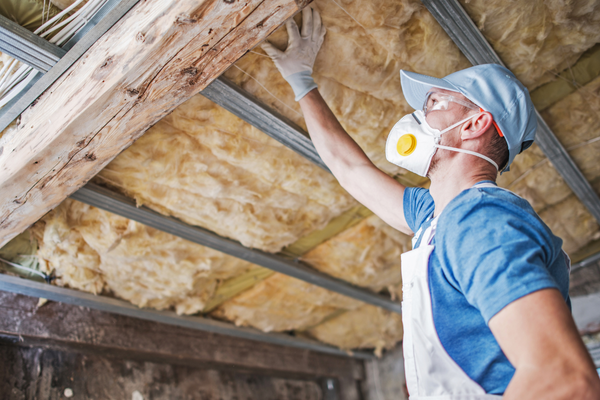
Technicians enter the attic wearing full personal protective equipment (PPE). This means they wear respirators, goggles, and full-body suits. This is to protect them from breathing in fiberglass, mold spores, or bacteria. They start at the point farthest from the attic hatch. They feed the old, loose-fill insulation (like cellulose or blown-in fiberglass) directly into the vacuum hose. The vacuum sucks the material through the hose. It goes directly outside into a special filtration bag. This process keeps the material contained.
Bagging Batt Insulation
If the attic has batt-style insulation (the rolled-out blankets), the process is different. This type of insulation must be removed by hand. The crew carefully rolls up the batts. They are then put into heavy-duty construction waste bags. These bags are sealed up tight while still in the attic. This is very important. It stops fiberglass fibers and dust from becoming airborne and traveling through the house as they are carried out.
Detail Cleaning
After all the visible insulation is gone, the job is not finished. The crew then uses smaller tools and special HEPA-filtered vacuums. HEPA vacuums are hospital-grade. They can trap very tiny particles, like mold spores and dust. The technicians use these to clean the attic floor, the wood joists, and all the small crevices. This removes any leftover debris and dust. This is what separates a professional job from a basic one.
Sanitizing & Deodorizing
This step is highly recommended, especially after a pest or mold problem. The attic is treated with an antimicrobial fog or spray. This mist gets into every corner. It kills any remaining bacteria, viruses, and mold spores. It also destroys the pest pheromones and odors. This process fully sanitizes the space, making it safe and clean. This is a critical step for a healthy home.
Clean Up
The final step is a total clean-up. The crew rolls up all the plastic containment materials, folding the dirty side in. They remove all equipment and all the sealed bags of waste from the property. They do a final vacuum of the work area. They leave your home as clean as it was when they arrived. All that is left is a clean, empty, and safe attic.
What Factors Influence Attic Insulation Removal Costs?
Many homeowners in Jupiter who are looking for attic insulation removal near me want to know the price. It is not possible to give a flat-rate price without a full inspection. Every attic and every situation is different. The scope of the project can change a lot from one house to the next.
Here are the main factors that influence the work involved:
Type of Insulation
The kind of insulation in the attic is a big factor. Loose-fill insulation (like blown-in fiberglass or cellulose) can be vacuumed out. This is often a faster process. Batt insulation (the rolls or blankets) must be removed by hand, piece by piece. This is more labor-intensive and can take more time. Some attics might even have a mix of both types.
Amount of Insulation (Sq. Footage & Depth)
This is simple: a bigger attic takes more time to clear. The total square footage of the attic floor is a main factor. The depth of the insulation also matters. An attic with 12 inches of old insulation will take much longer and create more waste than a small attic with only 4 inches.
Level of Contamination
The reason for the removal is important. A light removal of old, ineffective insulation is a simple job. A heavy pest infestation or widespread mold contamination is a much more complex project. These jobs require more extensive safety precautions for the crew. They also need a much more thorough detailed cleaning and sanitization process. This impacts the project’s total scope.
Attic Accessibility
How easy is it to get into and move around the attic? An attic with a large, easy-to-access hatch and high ceilings is easier to work in. Attics with very low ceilings, small hatches (like in a closet), or many obstacles (like HVAC equipment, ductwork, or stored items) are much harder. These challenges require more time and labor to work around safely.
Sanitization Services
The choice to add services like antimicrobial fogging or deodorizing will be part of the project plan. These are often listed as a separate part of the project. While they are an added step, they are highly recommended for any project involving mold or pests.
Conclusion
Old, damaged, or contaminated insulation is more than just a small problem. It can be a hidden source of high energy bills, poor indoor air quality, and bad odors. It can even hide serious dangers like mold and chewed wires. For homeowners in Jupiter, FL, dealing with our high humidity and active pests, a healthy attic is a top priority.
Professional insulation removal is not just a cleaning service. It is a critical home restoration project. It is the first and most important step to fixing the problem for good. This process, as detailed in this guide to attic insulation removal, paves the way for a healthier, more comfortable, and more energy-efficient home. By clearing out the old, bad material, you create a clean slate. This allows a trusted company like All Thermo Insulation to properly air seal your attic and provide top-quality professional insulation services.
If you suspect your Jupiter, FL, home’s attic insulation is compromised by pests, water, or age, don’t wait. The problem will only get worse. Contact a trusted attic insulation professional from All Thermo Insulation for a thorough inspection. A professional can look in your attic, find the source of the problem, and give you a clear plan to restore your home’s health and efficiency.

