Why Jupiter, FL Homes Need Specialized Attic Insulation
The climate in Jupiter, Florida, presents a very unique and persistent challenge to every homeowner. It is not just the intense heat that troubles residences, but also the relentless, high humidity that blankets the region. Many homeowners forget that the attic of their house is the zone most affected by these twin forces. The need for specialized and effective attic insulation is not just an expense to consider; it is a fundamental requirement for protecting a home structure and keeping family comfortable. For those living in the Jupiter area, standard insulation is often insufficient for true energy savings. It takes a specialized approach to combat the intense solar heat gain and the constant, damaging moisture in the air. This necessity is why property owners turn to qualified services like All Thermo Insulation for professional guidance and installation of insulation for attic spaces.
High Solar Heat Gain, Extreme Humidity, and Constant HVAC System Strain.
South Florida faces conditions that differ greatly from other parts of the country. During the summer months, the sun beat down on rooftops, causing the temperature inside an uninsulated attic to climb very high, often reaching 150 degrees Fahrenheit or more. This hot air then radiates downward into the living space, making air conditioners work much harder. Coupled with this is the high humidity, which can be drawn into the home and cause comfort issues even when the air is cooled. The constant cycling and heavy load placed upon HVAC systems leads directly to high electricity bills and a shorter lifespan for the units. This cycle of stress on mechanical systems and financial strain is why the choice of attic insulation types is a matter of such importance in the Jupiter community. To explore solutions for your home, consider speaking with us at All Thermo Insulation.
Explaining Why the Attic is the Primary Source of Heat Transfer and Energy Loss in Hot Climates.
The attic is the biggest gateway for heat exchange in a house. Heat is transferred into the structure in two main ways: conduction through the roof materials and convection through air leaks. Without proper attic insulation, the conditioned air that homeowners pay dearly to cool escapes easily, while the scorching hot air from above enters just as easily. This energy loss is a primary reason for high utility bills, far exceeding losses from walls or windows. Improving this thermal boundary is the most effective single step a Jupiter homeowner can take to control their indoor climate and reduce expenses. Addressing the attic first is always the sensible and financially responsible initial strategy for energy efficiency. This critical area is where All Thermo Insulation focuses their over 20 years of experience to deliver genuine results.
How Proper Insulation and Air Sealing Can Lead to Significant Cost Savings and Comfort Improvement Specifically for Jupiter Residents.
This guide is established to furnish Jupiter residents with precise information regarding the most effective insulation techniques and materials for this specific climate. The proper installation of attic insulation alongside professional air sealing is demonstrated to lead to substantial cost reductions and an undeniable improvement in indoor comfort. It helps the house maintain a consistent, cool temperature without the constant noise and high electrical draw of the air conditioning unit running all day. The information presented herein intends to clarify the differences between materials and to provide the necessary understanding to make an educated choice for your property’s long-term well-being. To learn more about our full-service insulation solutions, contact us today.

Understanding Insulation Fundamentals: Defining R-Value
Before any decision regarding insulation for attic installation can be made, a clear understanding of fundamental insulation terminology is required. The term attic insulation refers to any material designed and placed to create a barrier against heat flow. This barrier slows the rate at which heat moves from hot areas to cold areas. In Jupiter, the heat is always trying to move down from the hot attic into the cool house, and insulation is the shield that resists this movement. This thermal resistance is quantified by a standard measurement that every property owner should know and understand.
What is Attic Insulation and How Does it Work?
Insulation is simply a thermal barrier. It consists of materials that contain many small air pockets, which are very poor conductors of heat. By slowing the transfer of heat, these materials prevent the cooling that is wanted inside the house from leaking out, and they prevent the unwanted, intense heat from the attic from moving in. When homeowners search for attic insulation companies, they are seeking experts who know how to place this thermal material correctly to maximize its effect. A well-insulated house maintains a more stable temperature, reducing the work required by the cooling system.
What Does R-Value Mean for My Home?
The term R-Value is the standard measure of thermal resistance for insulation materials. The “R” stands for resistance. What does R-Value mean for my home? R-Value is a measurement of an insulation material’s ability to resist the movement of heat. A higher R-Value indicates greater thermal resistance, meaning the material is better at keeping heat out in the summer and heat in during the winter. For a Jupiter residence, a high R-Value is essential to combat the relentless daily solar heat gain. It acts as a critical gauge of the material’s effectiveness for your specific regional needs. This simple number is what All Thermo Insulation considers foremost when advising clients on best attic insulation options.
What R-Value Do I Need in Jupiter, FL?
Federal guidelines divide the country into various climate zones, and the Jupiter, FL area is classified under Climate Zone 1. This zone requires specialized attention due to its focus on cooling rather than heating. The recommended R-Value range for new construction or homes adding to existing insulation in Climate Zone 1 is typically R-30 to R-38. However, R-Value is affected by the type of material and the existing structure of the attic space. It is a vital opinion of industry professionals that a complete, professional assessment is needed to confirm the perfect attic insulation cost and R-Value for any specific property. Guessing at this critical number can negate the entire investment in insulation for attic spaces. To schedule a home evaluation and learn your ideal R-Value, you may speak with an expert today.
A Comparison of Insulation Types for Florida’s Climate.
Choosing the correct attic insulation types is the most important decision for a Jupiter homeowner. Not all materials perform equally well against the high temperatures and persistent moisture present in South Florida. The right choice can mean the difference between minor savings and dramatic, long-term energy efficiency. The service provided by professional attic insulation contractors includes an evaluation of existing conditions, such as the shape of the attic and any current moisture problems, to determine the superior material application.
What is the Best Blown-In Insulation for High Humidity?
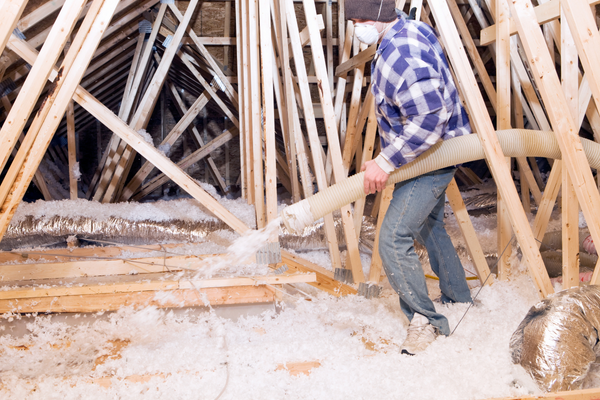
Blown-in insulation, also known as loose-fill, is popular for its ability to fill irregular spaces and around obstructions. Two primary forms are widely seen in the industry: fiberglass and cellulose. The fiberglass loose-fill is often a very cost-effective choice and does not attract moisture, which is a clear benefit in Florida. However, it can settle over time, reducing its R-Value, and it provides only a moderate barrier against air leakage. Cellulose loose-fill, which is made from recycled paper products, provides a very dense air barrier. The density is a plus for thermal performance. The important drawback here is that cellulose can hold moisture if the attic is not perfectly air-sealed, which can be problematic in the intense Florida humidity. Homeowners looking for efficient, professional insulation installation often weigh these factors carefully.
Is Batt/Roll Insulation a Viable Option in Jupiter Attics?
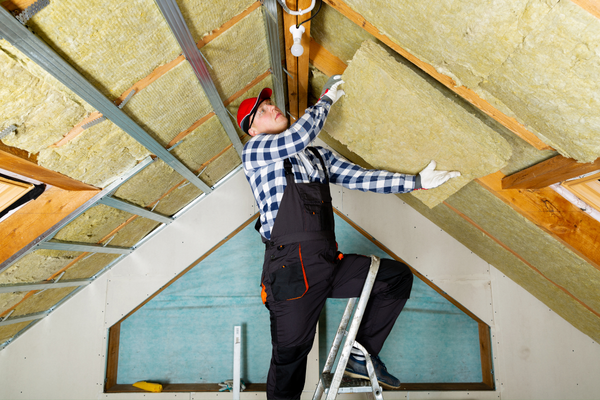
Fiberglass batts, which come in pre-cut rolls, are a common form of insulation often seen in new construction. It is a viable option for attics with standard, uniformly spaced ceiling joists. However, the unique construction of many older Jupiter homes often features non-standard framing or numerous obstructions, such as wires and pipes. When batt insulation is cut or compressed to fit around these obstacles, its R-Value drops sharply. This leaves gaps and cold spots, which is a condition known as thermal bridging. Batt insulation simply doesn’t conform to the shape of an attic floor as well as loose-fill or spray foam, leading to less effective insulation overall. For reliable attic door insulation and main attic space coverage, All Thermo Insulation recommends materials that offer greater coverage consistency.
Why is Spray Foam Insulation Highly Recommended in Humid Climates?
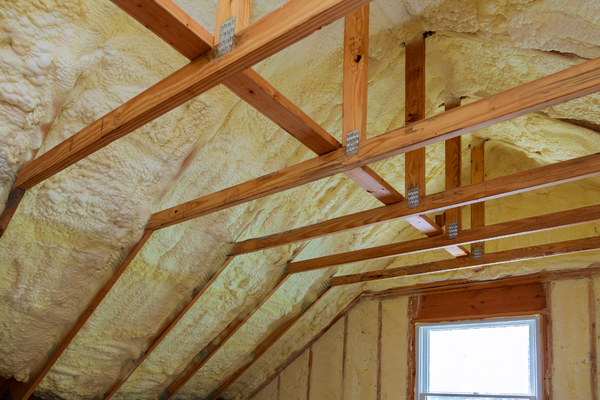
For the specific environment of Jupiter, spray foam is often considered the most technologically advanced and effective solution. It is unique among attic insulation types because it performs two vital functions at the same time: it serves as a high-performance insulator and as an incredibly powerful air and moisture barrier. It is often cited as the best insulation for attic spaces in hot and humid zones. There are two main types of spray foam:
Closed-Cell Foam: This type is dense and rigid. It offers a very high R-Value per inch and completely prevents moisture intrusion. It is the preferred choice for applications where both air sealing and structural integrity are necessary.
Open-Cell Foam: This type is lighter and more flexible. It provides excellent insulation and air sealing but is permeable to moisture vapor. While it works well in certain controlled interior applications, its limitations compared to closed-cell foam in areas of extreme humidity, like South Florida, are something to consider. Because of its ability to stop air movement and moisture transfer simultaneously, choosing spray foam is often the preferred opinion of experts when dealing with the high energy demands of Florida. To see what your local insulation partner can offer, please reach out.

Essential Benefits: Why Jupiter Homeowners Invest
The decision to upgrade attic insulation moves beyond simply saving money on a bill; it is an investment in the entire home environment. Jupiter homeowners who make this essential upgrade immediately experience improvements that make daily living far more comfortable and affordable. The benefits address the most common and expensive issues that arise from operating a house in a subtropical climate, focusing on attic insulation near me that provides tangible local value.
How Does Insulation Reduce My HVAC Costs?
The correlation between quality attic insulation and lower HVAC costs is direct. In Jupiter, the air conditioner is the single largest consumer of electricity. The insulation decreases the amount of heat radiating into the home from the attic. By slowing this heat transfer, the AC unit does not need to run as frequently or as long to reach and maintain the thermostat setting. The runtime is greatly decreased, which lessens the load on the compressor and fan. This reduction in system stress and operational hours translates into undeniable savings on monthly utility statements. It’s a fundamental step in smart home management that All Thermo Insulation champions for local property owners.
How Does Proper Insulation Prevent Mold and Mildew in Florida?
A very important, often-overlooked benefit of excellent insulation for attic spaces in humid environments is the prevention of moisture-related issues. Mold and mildew thrive when warm, moist air meets a cool surface, causing condensation. In an uninsulated or poorly insulated house, the ceiling surface can be much cooler than the humid attic air, allowing water droplets to form. Proper, continuous insulation stops condensation from forming when hot attic air meets cool ceiling surfaces. Furthermore, an effective air barrier, which is often installed alongside the insulation, prevents moisture-laden air from entering the attic or living space, cutting off the supply of water vapor necessary for mold growth. For a healthy home, clean attic insulation removal is sometimes the first step before installing a new system. Learn about professional attic cleanup options.
What is Thermal Comfort and How Does Insulation Improve It?
Thermal comfort is the state where an individual does not feel too hot or too cold. Many Jupiter homes struggle with “hot spots,” where certain rooms or corners feel noticeably warmer than others, forcing residents to turn the thermostat lower than necessary. Attic insulation creates a uniform thermal barrier across the entire ceiling, eliminating those inconsistencies. When the attic temperature is stabilized, the temperature inside the home becomes more stable and evenly distributed. This uniformity means that the occupants feel more comfortable at a slightly higher, and more energy-efficient, thermostat setting, improving the overall quality of living.
Improving Indoor Air Quality and Pest Control:
Many forms of best insulation for attic applications, particularly spray foam, also double as highly effective air sealants. This sealing effect reduces the amount of unconditioned, dirty air that is pulled into the home from the attic space. This results in better indoor air quality by reducing the entry of dust, pollen, and allergens. Additionally, by sealing up tiny gaps and cracks in the attic floor and structure, homeowners can reduce entry points for common Florida pests, like insects and rodents. The benefit of clean air and fewer pests is an additional human perspective benefit that goes beyond just energy savings, making the house a healthier place to live. If you need service options, speak with an expert today.
Attic Insulation Myths Debunked
There exists several misunderstandings regarding attic insulation that can lead Jupiter homeowners to make poor, costly decisions. Separating fact from fiction is necessary for making an informed choice about house improvements. It is important to know that what works in colder northern climates often does not apply or is counterproductive in a hot, humid region like South Florida.
Myth 1: Is a Vented Attic Always Better than a Sealed Attic?
For decades, the common opinion was that attic ventilation was necessary to keep the attic cool and dry. While venting still serves a purpose in traditional systems, there has been a significant shift in expert perspective in hot climates. In a place like Jupiter, pulling 95-degree air from outside into the attic to cool a 150-degree space does not work very well. The best, modern solution is often the creation of a conditioned, sealed attic, especially when using spray foam applied directly to the underside of the roof deck. This method brings the attic space closer to the temperature of the house, keeping the heat out entirely. This is a crucial distinction when considering attic insulation companies for your local Jupiter project.
Myth 2: Does Insulation Provide a Complete Air Barrier?
It is a common error to believe that simply adding a thick layer of attic insulation solves all problems. Insulation material itself, especially loose-fill or batt, is not an air barrier. It is designed to slow heat transfer through conduction, not stop air flow. Why air sealing is the crucial step before adding insulation: Insulation slows heat, but air sealing stops the movement of air that carries moisture and heat. Gaps and cracks allow air to move freely, bypassing the insulation completely. Air sealing must be performed first to plug these leaks, and then the insulation is applied to create the thermal resistance. If you ignore air sealing, even the best attic insulation will not perform to its full potential. The professional installers at All Thermo Insulation always prioritize a thorough air sealing process.
Myth 3: Is All Insulation Fire Resistant?
While modern attic insulation materials are designed with fire safety in mind, it is incorrect to assume that all insulation is entirely fire resistant. Most insulation materials are treated with fire-retardant chemicals to slow the spread of flame. This is where the importance of professional installation and adherence to local Jupiter codes becomes clear. Regulations dictate how certain insulation materials must be covered or installed to meet safety standards. For instance, some foam products require an ignition barrier. Homeowners must relies on licensed attic insulation contractors to certify that the materials used and the methods of installation comply with all established safety protocols. Trust the expertise of All Thermo Insulation to meet these critical requirements.

Maximizing Energy Efficiency: Air Sealing & Maintenance
The path to achieving maximum energy efficiency in a Jupiter home involves more than just selecting the right attic insulation types. It is a process that includes meticulous air sealing, addressing all components within the attic space, and establishing a simple maintenance routine. This comprehensive approach is what truly separates a decent insulation job from an exceptional one that delivers decades of savings and comfort. This extra level of detail demonstrates the expert perspective that is so needed in this field.
The Critical Step of Air Sealing:
Air sealing is the process of closing every gap and penetration in the ceiling plane between the conditioned living space and the unconditioned attic. The common leakage points are numerous: the openings cut for electrical wiring, the housings around recessed light fixtures, bathroom and kitchen exhaust fan penetrations, plumbing vent pipes, and the access hatch or pull-down stairs to the attic. Even small holes can contribute to significant energy loss and moisture problems over time. All Thermo Insulation’s technicians use specialized sealants and techniques to address these points before any insulation for the attic is installed, stopping air flow at its source. This careful, methodical preparation is the secret weapon against high utility bills.
Don’t Forget the Ductwork:
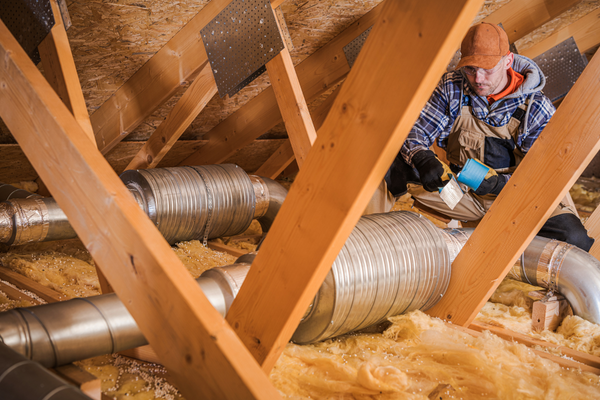
In many older Jupiter homes, the HVAC ductwork runs directly through the hot, unconditioned attic space. This means that the cold air that is supposed to be entering the living room is often traveling through a space that is over 130 degrees. The ductwork itself is frequently leaky or poorly insulated. Why insulating and sealing HVAC ductwork in the attic is as important as insulating the ceiling: The cold air inside the ducts warms up significantly before it reaches the vents, making the air conditioner run even longer. Sealing leaks and applying thick insulation to the ductwork prevents this heat transfer and is a vital secondary step to complement the attic insulation on the floor. For homeowners seeking services, they should always enquire about duct sealing when looking for attic insulation companies near me.
Maintenance Tips:
Once new attic insulation is installed, very little is needed to maintain it. However, homeowners should conduct regular, simple checks, particularly following any severe weather events. The most important thing to look for is evidence of water leaks, which can damage any type of insulation material and lead to mold. Homeowners should also monitor for settled insulation, which is more common with certain loose-fill types. If insulation settles, its R-Value is compromised, and new material may be needed. Regular attic cleaning is also advisable, especially if there has been any pest activity. All Thermo Insulation provides getting your attic ready services to keep your space in top shape.
Conclusion: Take Control of Your Energy Bills
The high temperatures and oppressive humidity of the Jupiter, FL region requires a specific, professional solution to home energy consumption. The attic is the single most critical area to address for thermal performance. Attic insulation is not merely a home improvement; it is a fundamental strategy for achieving financial savings, structural preservation, and superior daily comfort. Understanding the differences between attic insulation types, especially the advantages of spray foam in Florida’s humidity, equips the homeowner with the necessary knowledge to make the right investment. This investment pays itself back many times over through reduced energy costs and a longer life for the AC unit. Investing in the correct R-Value and type of insulation is the single best long-term investment for comfort and cost savings in South Florida.
Reiterate the Specialized Needs of Jupiter Homes
Jupiter homes face a triad of challenges: intense solar heat, pervasive humidity, and a perpetually high cooling load on the air conditioning system. Traditional building methods and materials are often inadequate for these demands. A successful insulation strategy must address all three factors simultaneously, not just heat resistance. This is why local experience matters. Working with a company that understands the specific needs of South Florida homes, from the necessary R-Value to the preference for moisture-resistant materials, is the key to a job done right. This local focus sets expert attic insulation contractors apart from generalists. We hope this guide helps you understand the needs of your home.
Investing in the Correct R-Value and Type of Insulation is the Single Best Long-Term Investment for Comfort and Cost Savings in South Florida.
The evidence is clear: for any Jupiter homeowner committed to reducing their carbon footprint, protecting their property, and lowering their monthly outgoings, upgrading the attic insulation is the most effective singular action to take. It is a long-term solution that provides immediate returns in comfort and energy efficiency. It is the advice of all professionals that this critical home upgrade is treated as a priority. This investment secures the thermal envelope of the house for many years, offering stability and predictability in a climate known for extremes. The value of this upgrade far exceeds the initial outlay over the lifespan of the home.
Consult a Licensed Local Jupiter Insulation Specialist for an Inspection and Customized R-Value Recommendation.
While this guide provides a wealth of information regarding attic insulation types and benefits, every home is unique. The age of the structure, existing insulation, roofing condition, and specific geometry of the attic space all impact the final recommended solution. The absolute best next step is to consult a licensed local Jupiter insulation specialist for an inspection and customized R-Value recommendation. The team at All Thermo Insulation offers professional, no-obligation assessments based on over 20 years of experience serving the Jupiter area. To move forward and secure your home’s energy future, schedule a home evaluation with your local experts today. Take control of your home’s efficiency today with All Thermo Insulation.

